OSD600 – Release 0.3

So for our final release, I’ve decided to work on a bug on Brave which I previously have experiences working with.

In this release, I have picked this issue#12569 to work on.

So what is the bug?

Well, the bug that they have issued is that the audio indicator will still be on even if the video is over or stopped.

To start off I will explain two things that Brave uses, the first notable thing is that Brave has an audio icon on the tab like this:

The icon here isn’t very special, it has the same functionality as Firefox. The user can choose to mute or unmute the tab if they wish to do so. But another thing it does is when the user has too many tabs open it will switch from the icon to a blue bar to replace the icon as a way to indicate the user that there are currently sounds coming from here.

The bug that is currently happening is the blue bar audio indicator will still remain after the video has been posted or was done playing.

Research

From the information that I have gathered after looking at the bug, it seems to be that if the user mutes the tab itself it will always display the blue bar indicator on top no matter what.

The reason why I believe this was the cause is that of once the tab is muted it doesn’t check if the video is completed or not.

IE:

As you can see the video is clearly over but the mute but the audio is still muted.

The Process of Bug Finding

So from the information that we know, the bug seems to be something that has to do with audio. The first thing I did was typed in:

git grep audio

As you can see we found a lot of results, so let’s just find what we think is useful.

The first thing that caught my eyes was a file name audioState.js, and another thing that caught my eyes was something called audioTabIcon.js.

So far we found two files that sound interesting and may or may not have to do with our bug.

The first file I looked at was the audioTabIcon.js. The js file doesn’t seem to have anything to do with the audio indicator.

So I moved onto the next file: audioState.js.

After looking at this for a couple of hours, I started to look at how the other variable is interacting with this javascript.

Fixing the bug

Interestingly the audioState.js doesn’t really interact with anything that causes it to change. Everything seems to be in this file, so my fix for this bug is to add a condition to check if the audio is muted or not.

If the audio is muted it will not be able to show the blue indicator as there shouldn’t be any sounds coming from that tab. After implementing the changes it seems that the bug has been fixed.

So I decided to write a test file to check if the audio indicator will still show or not.

This small test just checks if the audio is muted or not and check for the audio blue border. The problem is expected to return false as the bar should not be able to appear.

Now that we have added the changes we also are ready to make a PR. The PR request is here.

In conclusion, after finishing this bug, I felt it was very refreshing, I learned a lot more about Brave in general. Like I would not know that these were features that it has. Overall,  I think this was a very interesting bug to do.

OSD600 – Lab6

For this lab, we are to fix a bug in the brave browser. The bug is an issue with URL parsing, in particular, when the user enters a space within the search bar.

Some example is:

https://www.google.ca/search?q=dog cat

 https://www.google.ca/search?q=dog cat

When the user tries to enter something similar to the one above the user will get this screen.

As you see above, it enters the URL and uses it to do a google search. Upon first thought, it seems that Brave somehow interpret the whole URL link as a string. Likely we know where this bug is most likely hiding. The place we check was a file called urlutil.js. As we scroll down the Javascript file we found something very interesting. There’s a function that is called isNotURL.

Now to see if the cause of the bug is from here we put some breakpoints on a certain part of the program that we think might have caused the bug to occur. After running the program in debug mode the bug seems to have happened when the program reads this line here.

This line here checks if the string that was sent in and see if it an URL or not. So what seems to have happened is that the space that was entered in between the dog and cat it will cause Brave to think that the URL entered above is actually a string. The reason why it thinks its a string over a URL is mainly that Brave does not read a space as the code %20 causing the URL not to work. So to fix this problem all we really need to do is to replace that space with a %20. Luckily for us, the URL that was passed in was a string so we could do the following to fix it.

And last but not least, we need to write a test to make sure this hasn’t broken anything else in the program. The test for urlutil.js is in a file called urlutilTest.js. In the test, we can find similar tests in it so all we have to do is added our part to the test to see if what we fixed will work with the pre-existing part.

We will now try to run this test to see if it works.

In our first terminal, we enter the following to ensure everything works:

npm run watch-test

Next, we will type the following in a different terminal. We will use a grep to find the certain test so that we will not have to sit through the whole testing process.

npm run test -- --grep="getUrlFromInput"

It seems that our test has gone through successfully and did not break anything which good.

As you see above the space in between dog and cat has been replaced with a %20, and this will also fix the same problem with files. Below will you can see that it also fixes the bug within the file read part.

In conclusion, the bug that we fix was certainly interesting. I was able to learn more about how Brave deals with the URL that got passed in.


Release 2.0 Blog

For this pull request for release 2, I have done a pull request for a project that is called vgstation13. I have chosen this as my bug to do due to time constraint I have for brave. Although I will be going over all the details or information that I have gathered over the course of time while researching my bug.

Introduction to vgstation13

But first I must explain what vgstation13 is. This project was originally based on something called Space Station 13. It runs off from a platform called BYOND. This is basically a requirement if you wish to play/develop the game. Although it’s based on a game called Space Station 13 the game does not take itself not too serious compared to the original.

While in the game you can pick any class you desire to choose but if that role has been already picked it will then assign you another role. The game from the outside looks very simple but it has a very complex system behind it. Each player that enters the game has to play their role, what they are needed to do will depend on what role the player has chosen or given.

A simple way to say what this game is, it is a Space Station simulator, the player is simulated in an outer space environment, and are given tasks that they must do in order to make money and survive. There will be other events that can occur like murders, an experiment that went wrong creating mutants, and anything you can probably think of in a sci-fi game.

The bug that I have fixed a very simple one as it was just a request to remove codes that were not needed.

The issue can be found at the following link:

https://github.com/vgstation-coders/vgstation13/issues/10777

As requested by them, it was to remove a certain disease call Plasmoid. And that the file was last updated on 23rd August 2010. That itself was very easy to fix as they also linked where the bug was at.

To fix the code we just need a couple of files installed:

The first thing we must installed is BYOND and there you must also create an account to login with.

After installation of BYOND, you will be required to sign in on the client. Once those things are completed you will have something like this:

When everything is done all you have to do is close the client and it will minimize the client. There isn’t anything else you need to do here in this client but there are other games that you can install on the left side from the list.

Our next step is to download the source files. You can find the project file from here: https://github.com/vgstation-coders/vgstation13

Once that is completed, you will have to modify some config files. You will need to open the filename config-example within the project. In that folder, you will find a folder named admin_rank.

An example of where the file could be found is here:

D:\Github\vgstation13\config\admin_ranks.txt or
D:\Github\vgstation13\config-example\admin_ranks.txt

Inside the file, you want to copy

Game Master

and that’s all.

Next, we will need to go to the other config file and find the file name admins.txt.

In the text file, all you have to do is enter your username and paste and give yourself the Game Master role. Don’t worry this won’t affect the game! This is only needed for us to do our testing.

Then, we must go back and run the following executable:

vgstation13.dme

Once that is run you will get a client like above. The client below that are shown will be our code editor and way to access other files.

Then you must click build >> compile.  The compilation will be quite slow on your first compile.Untitled.png

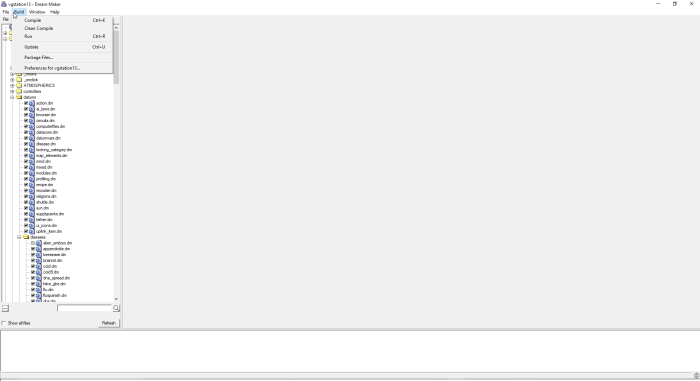
Once you are done compiling do the same thing but click on run instead.

When the client finish running you will get another client that has all the things you need:

Here is the client that you will be using a local server and game. All that is left to do is to create a character and set your occupation as a Captain to high and save. When everything is finally completed you will need to declare ready and go to the server panel and select “Start Now”.

When everything is up and running you will see this screen:

This is the testing interface that we will use for our testing purposes. There are many things you can do as an admin so you can play around and get used to the control and how to use other things to fix help other bugs.

To fix our code we will need to go to the following paths and delete the codes

The path can be found in:

code/datums/diseases/plasmatoid.dm

Next, we will also have another line that calls this function in vgstation13.dme:

In this screen, all you have to do is delete the include line and we are done with this bug.

Brave PDF.js

Finally, we will be talking about Brave. But more specifically I will be talking about PDF.js. This was the original bug that I was planning on doing but due to time constraint I will not be able to do this but hopefully, I will be able to complete this as a follow up for Release 3 that will be coming up!

Introduction to Bug

Firstly, if we can reproduce the bug. Luckily the issue that we are working with has a pdf file that we can use for a testing purpose.

http://mei.org.uk/files/papers/C3_2016_June.pdf

The issue says only certain PDF file will not render everything part of the document. But instead, render blank spaces. Let us see if we can re-create this.

It does seem like it doesn’t render a lot of words beside the first couple of them. But to be sure that this isn’t just a PDF file problem let run it on another browser like FireFox.

Huh.. From what it looks like it doesn’t seem to be the PDF itself so it must be something like the pdf reader. If we go back to the Brave we can actually highlight the blank spaces.

and if you right click the blue lines you can actually get what actually written on the page.

This investigation rules out one possibility, which is the pdf reader not reading the actual lines.

Research

While researching about how to fix this bug I stumble upon a couple of key information that can help me with fixing my bug.

How I figure where I want to find where I wanted to work on was to find anything that has to do with PDF.

Few things that I did was do a search in the GitHub search engine, and by doing the grep command from the terminal.

Some of the files that got my interest was PDF.js and PDFJS.js.

/* This Source Code Form is subject to the terms of the Mozilla Public
* License, v. 2.0. If a copy of the MPL was not distributed with this file,
* You can obtain one at http://mozilla.org/MPL/2.0/. */

This here tells us that the original source code came from Mozilla. This also tells us where to search when we need more information.

https://github.com/brave/browser-laptop/blob/master/app/pdf.js

The first file I looked at was pdf.js. While looking at this there are a few things that come to mind. The first thing is renderToPdf, from what we saw during the investigation it seems that it’s not rendering properly so this might be the thing that can help us. But we can come back to this later but we should check the other PDFjs.js to check to see if anything else will help us out.

https://github.com/brave/browser-laptop/blob/master/app/pdfJS.js

This file doesn’t look too useful as it checks if the file is a pdf or not and pdf’s properties. So let’s go back to pdf.js to see if we find any more interesting thing that can help us.

While going back to pdf.js I figure why not look at the Mozilla code and see if there are any changes that they made that can help us. Consider they did use their as a base to create the pdf.

When looking for Mozilla pdf.js the first link that was shown was to Mozilla’s GitHub:

https://github.com/mozilla/pdf.js

Then we start looking for something like a file called pdf.js. And luckily we were able to find it in the src file:

https://github.com/mozilla/pdf.js/blob/master/src/pdf.js

On first glance at this code, it looks completely different from the pdf.js in Brave. Brave’s pdf.js contains one functions module while Mozilla’s pdf.js contains many functions and required that it uses.

This got me thinking. What does Brave’s pdf.js do, after reading it a bit more I realized it was only used for rendering/display all the information it has gotten onto the page and that’s it.

Then I decide to actually check the Browser Developer Tools on Brave. And hold and behold. There’s were errors that were ignored during the tasks.

And if you look carefully there’s another file its using:

<pre>pdf.worker.js:344</pre>

This file was not there when I was searching with grep nor GitHub. So I decided to look into the page.

While looking at the pages, I decided to check out the other directories and see what there is. Within the content/build is another pdf.js. Wow, this is getting confusing having 4 different type of file name pdf. Things that I notice while debugging was that it looks like it loaded from a remote server of some sort.

Secondly, it seems to have the similar files in Mozilla’s pdf.js GitHub. But these files are not entirely the exact the same. So I started to think maybe similar bugs might have happened to Firefox before. After searching the web, I was able to find a couple of issues that were fixed. But they all lead back to Mozilla’s pdf.js.

So the bug was fixed around 4-5 months ago but the Brave’s pdf file was last updated 2 years ago. So technically all we need to do is merge the changes from Brave and Mozilla’s pdf.js file right?

Well, it’s not that as I stated above the pdf.js and pdf.worker.js file seems to somewhere in a remote server. So there isn’t a way for us to update the file as of now.

Currently, I’m trying to talk with the Brave team to see if we are able to update the pdf files to fix the bugs.

Overall, this was a very interesting and exhausting experience for my first real open-sources contribution to any projects. I had learned many new things and hopefully, I will be able to do a follow up to complete the PR for Release 3.

Lab4: Messing around with tests

For this lab, we are to try and make the existing tests better. But before we start creating new tests we must first get the project that we are working with.

We will be working with ECMAScript and learn how to contribute toward Open-Standard.

The project that we are working on today is the following:

https://github.com/bterlson/test262-harness#test262-harness

In that Github, there are instructions on how to build the projects.

The first step that we must do is to clone the repo:

git clone https://github.com/bterlson/test262-harness.git

Once you have entered the repo enter the directory. Within the directory, we must now install.

npm install -g test262-harness

Next step all we need to do is run the tests to make sure it works

test262-harness test/**/*.js

When you finish running the test you should have something similar above.

In our case, it seems like we got errors from Default locale. But otherwise, everything should be working as it should.

Our next step is to modify the array.reverse test.

For this lab, I have picked S15.4.4.8_A1_T1.js.

From what the test looks like we can re-use the available variables and use it for our own tests that we will be writing. It should be relatively simple as we will be replacing those errors and if statement with assert.sameValue();


// Copyright 2009 the Sputnik authors. All rights reserved.
// This code is governed by the BSD license found in the LICENSE file.
/*—
info: |
The elements of the array are rearranged so as to reverse their order.
The object is returned as the result of the call
esid: sec-array.prototype.reverse
es5id: 15.4.4.8_A1_T1
description: Checking case when reverse is given no arguments or one argument
—*/
//CHECK#1
var x = [];
var reverse = x.reverse();
assert.sameValue(x, reverse, "Value are not the same!");
//CHECK#2
x = [];
x[0] = 1;
var reverse = x.reverse();
assert.sameValue(x, reverse, "Value in X[0] = 1; Actual: " + (reverse));
//CHECK#3
x = new Array(1, 2);
var reverse = x.reverse();
assert.sameValue(reserve, x, "Value does not match. Actual: " + (reverse));
//CHECK#4
assert.sameValue(2, x[0], "Value does not match. Actual: " + (x[0]));
//CHECK#5
assert.sameValue(1, x[1], "Value does not match. Actual: " + (x[1]));
//CHECK#6
assert.sameValue(x.length, 2, "Length does not match. Actual: " + (x.length));
/*
if (reverse !== x) {
$ERROR('#1: x = []; x.reverse() === x. Actual: ' + (reverse));
}
if (reverse !== x) {
$ERROR('#2: x = []; x[0] = 1; x.reverse() === x. Actual: ' + (reverse));
}
//CHECK#3
x = new Array(1, 2);
var reverse = x.reverse();
if (reverse !== x) {
$ERROR('#3: x = new Array(1,2); x.reverse() === x. Actual: ' + (reverse));
}
//CHECK#4
if (x[0] !== 2) {
$ERROR('#4: x = new Array(1,2); x.reverse(); x[0] === 2. Actual: ' + (x[0]));
}
//CHECK#5
if (x[1] !== 1) {
$ERROR('#5: x = new Array(1,2); x.reverse(); x[1] === 1. Actual: ' + (x[1]));
}
//CHECK#6
if (x.length !== 2) {
$ERROR('#6: x = new Array(1,2); x.reverse(); x.length === 2. Actual: ' + (x.length));
}
*/

view raw

Lab4.js

hosted with ❤ by GitHub

After writing the test lets make sure everything still works as it. To do this we can re-run the test script again to see if there any more additional fails added because of us.

test262-harness test/**/*.js

Great!! Everything looks like its working and we have not broken anything from our code tests. With this completion, it will be our first attempt at writing and analyzing with open standard code.

Bridge-Troll: Dark Mode Feature

For this week, we were assigned to give the project Bridge Troll an implementation.

This bug that we were given was to add a new feature that will change the colour of the map depending on the time of day.

If the user current time is in between night and sunrise then the map will be changed to Dark Mode. What Dark Mode does is it adjust the setting of the map and make it darker.

Steps for us to start:

First of all, we to clone the repo of Bridge Troll

git clone https://github.com/humphd/bridge-troll.git

Like every other project, we must first get the dependencies of the modules so we must do:

npm install

After installing the dependencies of the project, we should also check to make sure everything is working. To do so we must run:

npm run watch

And on another terminal we must run:

npm start

When our server starts the link address will be the following:

http://localhost:8080

Next Step

How I change the mode was using a library call SunCalc. This library calculates various things like when is the sunset, sunrise, and etc.

Leaflet maps can be found from here: http://leaflet-extras.github.io/leaflet-providers/preview/

For this lab, I will be using this library to get when will the sun rise and set. By doing calculation we can figure when will the users current local time will be in the range of night and morning. When the current time hits night/sunset the program will set the map theme to dark as shown below:

When the current time reaches morning/sunrise the theme will go back to the original theme which was the light version:

In Conclusion

Overall, this exercise was indeed very helpful it allowed me to learn new stuff about nodejs that I have not encountered before.

OSD600 Release 0.2 Introduction

For my release 2.0 I would be introducing the project that I will be focusing on. The Open-Source project that I choose to contribute toward is Brave.

brave_icon_shadow_300px

For those who don’t know what Brave is. Brave is an Open-Source Browser that was created using electron. Wonderful things that brave has compared to other competitions, Brave has a bunch of amazing features that already pre-installed which does not require you to down yourself. Some of these features are ad-block, the ability to block trackers that can get your personal info.

Some browsers like chrome require you to download it yourself as a plugin and there are many versions of it. Some work and some doesn’t.

Download Link for Brave: Brave Browser

Brave Browser’s Github: Brave’s Github

While doing some research on Brave, some of the ways they communicate with each other seem to be through Discord, Github, and Forum. Although they do have a discord group it’s not too active but it does seem like when people do reply to each other. On the other hand, it’s does seem like there are people that they replied to people that have issues on Github very quickly. As for the forum, I haven’t fully checked out how active they are there. But overall the community seems very active and has many contributors that not just their own developers.

Ways I see people getting involved are really just people asking if they can help tackle a certain bug.

On a side note, they do have a CONTRIBUTING.md that lists all the ways you can contribute toward brave.

And that is it for this blog, my next blog I will be talking about the bug/s that I will be working on and hopefully they will accept my code.

Lab 3

For lab 3 we were supposed to fix a bug that is an issue on Github, which I was excited about. But unfortunately, I was not able to fix any of the bugs that I was working on.

The first bug we tried was the following bug. The problem was that we could not re-create the issue that was posted.

Things that we tried, base on the instruction on how to reproduce the errors were:

  1. Create a directory with 10,000 files.
  2. 10,000 text-files with 5000 lines of codes
  3. Installing the extension that they were using “note: some of the extension we could not find so maybe one of them may have been the cause”

After all of that, we still could not reproduce the bug that was posted. So we also moved

The second bug we tried was a problem with opening an image that has double underscores in the name. This one we also could not reproduce the error, we also read a comment from a user “Kieferlam” who also tested in different version and still could not re-create it.

So lastly, we decided to look at a bug that about the user can not find a result if the user enters the following special character ‘{}’. For this bug, in particular, we were able to re-create it. The person that issued the post also linked a particular part of a code that he thinks might have caused the problem.

We decided to investigate this code that was suggested. To our surprise, this part of the code was actually removed almost a year ago. When they were trying to fix another bug at the time. But after a long search, we still could not figure out the root of the problem.

The things that I learn while doing this is that reproducing a certain bug can be very hard. Since there are many factors that you have to consider like the extension that they used, how powerful is their computer is, and think what other things the users might have done to cause the problem in the first place.


Release 1.0

Release 1.0 is an OSD600 project that we created to use the Libphonenumber that was made by Google. In this project, we are to create open-source server/application to use the Libphonenumber to parse phone-number from files and URL.

To start this project we had to select one of the following supported libraries or port one over into something you are using.

For this instance, I have decided to go with JavaScript as my programming type. Other programs that I used for this project was Node.js and Express as you can create a web server very easily.

As this is my first time using Node.js and Express. I have to look around to find how to use these frameworks.

The process of doing the release was mostly just messing around with the JavaScript and trying to find out how Multer and how to implement it into my own project.

My experiences as a maintainer verse being a contributor quite different.  Being a maintainer seems to be a  bit more enjoyable to me. It is interesting to see how people contribute to your project.

The most challenging part of the work was knowing where to start, once I found where I wanted to start it was very much easier. Then everything else seems to slowly come to me.

Things that I learned from doing this work was there were a lot of things that I need to look up, do my own research to make sure it everything works, and try testing more than once because it always somehow breaks the second time.

Overall, I felt that I have learned quite a bit while doing this project itself.

Lab 2

For our lab 2 that we are to install Visual Studio Code and also obtain a copy of the Visual Studio Code via Microsoft Github. Our goal today is just to mess around with VS Code and customize the Visual Studio to our liking.

Some of the Extension that I have installed are C/C++,  Debugger for Chrome, Python, and Dracula Offical.

C/C++ and Python were recommended to be installed when we follow the instruction on how to build Visual Studio Code.

Debugger for chrome felt very important to me mostly because I use chrome a lot so having a tool that helps you with debugging seems very helpful.

And Dracula Offical is just changing the theme colour of the background. I personally did not enjoy the default themes that much. I choose this extension purely on the theme colours that it comes with.

Another thing we had to do was to build VSCode from source. For the most part building, it was very straightforward. Some issue while building it occurred because I forgot to run Yarn. But after running it all the problem were fixed.

We were also supposed to research on one of the popular source projects. One that interested the most from all of them was Electron because people were able to use this to create stuff like Discord, VSCode.

Some of the things that I learned about Electron was it was originally named Atom Shell and it was started in April 2013. A year later it became open-source and then another year after they renamed it to Electron. And Electron V1.0 was then released a year later on May 2016.

Overall, it was an interesting experience from building your own VSCode, customizing my VSCode, and looking into what Electron was.


OSD600 Lab 1

So hello everyone, if this is your first time reading my blogs. My name is Kelvin Cho, I am a CPA student, and I am currently in my 6th semester of my school years! Today I will be blogging about an open-source project.

The project that I have selected to do for this lab is called Flick. Flick is an open-source project that was developed for the Oculus VR. It was developed to be a unit of time measurement and said to be “smallest time unit” which is according to them “1/705600000 of a second”.

Github to Flick:
https://github.com/OculusVR/Flicks

Some of you might ask, “Kelvin, why do we need another unit of time measurement?”

Well, this new unit of measurement is designed for visual effects creators. This new measurement allows them to sync up digital and audio frame easier.

This project originally started on October 26, 2016, by someone called Christopher Horvath who posted it on facebook. Many people later on contributed and refined the unit.

This project is only written in c++, there are currently 7 contributors, and the only issue that was issued was a request to fix the ReadMe.